But there is a way to improve the noise capabilities of your camera without loosing any picture details. This technique was a real surprise for me when I first heard about this trick from RC Conception. The only problem was to find a reasonable application area.
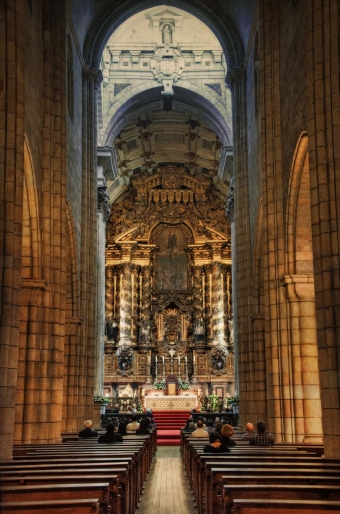
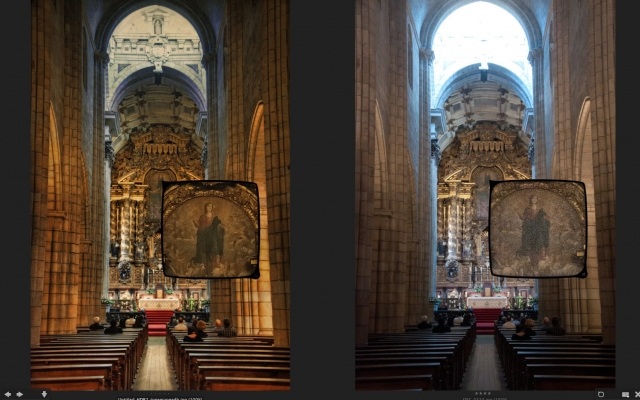
The idea is simple. Picture Noise is random. If you do multiple exposures of the same scene you can filter out the noise. The only problem that is left, that pictures with high noise reduction usually lose a lot of its color brilliance. Therefore, I combine this technique with my HDR techniques. The photo above was done in a very dark church in Porto. I didn’t had a tripod with me, so this shot was usually impossible to do without pushing the ISO setting to its limits. The shot was done with ISO 5000 handhold. Below you see a picture comparison between my final picture and the original ISO 5000 shot (you can click on the picture to look closer).
What do you think? Fascinating! You see especially the improvement of the picture quality, if you look on the small angel on the upper right side of Jesus. I think it is impossible to see in the original shot. So, how to do this?
- Find the right position for your picture and bump up your ISO so high that you can make sure to have an unblured shot (here ISO 5000, 1/20, f4.2, 30mm)
- Make a series of HDR shots (e.g. 3 exposure +2EV, 0, -2EV) Here my method link
- Just repeat step 2 at least 5 times (without moving the camera !!!) . I ended up with 5 times a series of 3 exposures, in total 15 shots.
- Load the 5 pictures of the same exposure settings into different layers of one photoshop document
- Auto-align the different layers with photoshop (Make sure that the alignment is perfect link
- Merge the layers together to a smart object and change the stack mode to mean
- Do 4-6 for all your exposure settings. In my case I end up with three photos (+2EV,0,-2EV) with perfect noise characteristics at ISO 5000
- Then I used the three exposure to great a HDR with my usual procedure
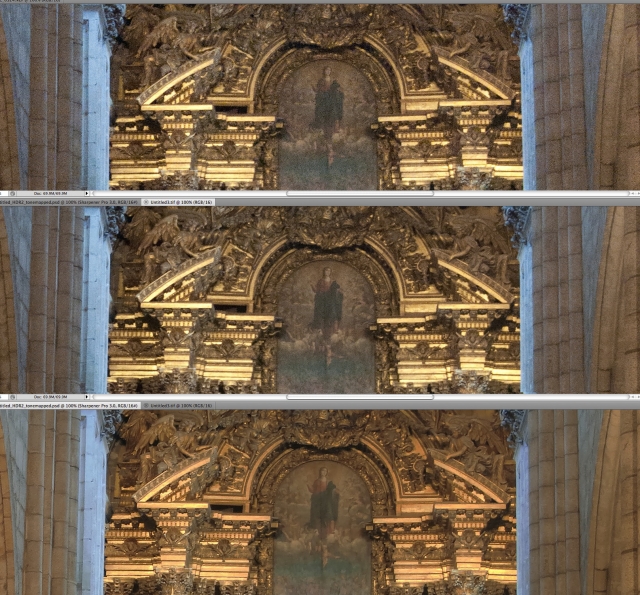
Below you see again a comparison of the picture qualities. The first picture is the original photo with ISO 5000. The second shows the unprocessed HDR. The third is the processed and sharpened HDR. Can you see the difference !?
There is a last remark. This complete technique makes only sense, if you don’t have a tripod with you. With a tripod you can just use a long exposure and ISO 100 and get similar image quality (maybe slightly better). But the situation that you can not use a tripod is not seldom (e.g. not allowed, on a trip with your wife, no space in the bag, no time to set it up 😉
Let me know what you think about the technique?
All the best
Werner


Great idea as tripods are nearly always banned inside churches etc.
After merging to smart object the stack mode is grayed out for me, I’m using CS5 (non extended), any ideas??
you are right churches and other public buildings are a typical area, where you miss often a tripod. Especially, if you try to make a symmetric shot, you are not free where you should put your camera.
that is symptom is strange for me.
Stack modes work only on smart objects. If you all pictures within the smart object aligned, you should go back to your original image (with the smart object layer) and select this layer. Then the stack mode should be changeable in the layers menue.
Sorry, that I can not give any other advice.
Best
Werner
OK, thanks, maybe I’m doing something wrong, I’ll check around.
Stack Modes are in CS4 and CS5 Extended versions only.
thank you for the comment. I was not aware that it is a extended version only feature.
Pretty likely you can do the same trick with image calculation (more complicated, but manageable). Give me a little bit time to figure it out for the people with no extended version.
I guess the same effect will be achieved using any HDR plugin.
This is a really interesting insight – will try it.
Which HDR plugin is not so central.
Basic idea is to use multiple picture to reduce the noise. Something that some manufacturer start to implement in their cameras
HDR sony cameras make awesome photos sony a6000 and sony a7