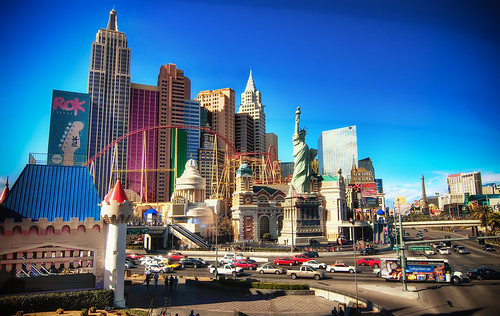
Some weeks ago, I made a weekend trip to Las Vegas. Felt a bit like in the movie “21” while flying from Boston to Las Vegas for the week end 😉
I do not need to tell anyone that this is an unbelievable place. Especially for photographers it is great, because everywhere are lights in different shades and colors. The buildings are made to impress and they do. In the next time, I will post continuously some of my best shots and there are still a lot, which are waiting for post-production. One of my favorite casinos in Las Vegas is New York, New York. I think it is awesome to rebuild a city in city.
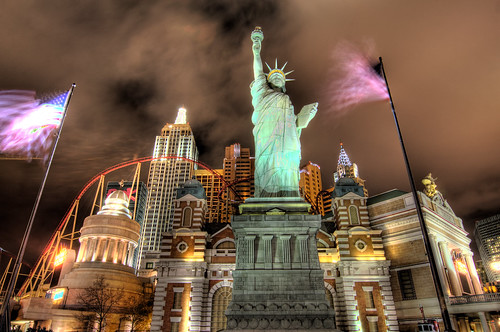
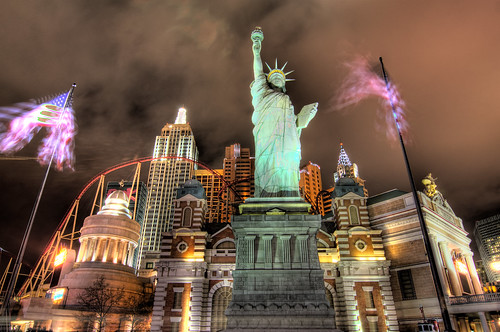
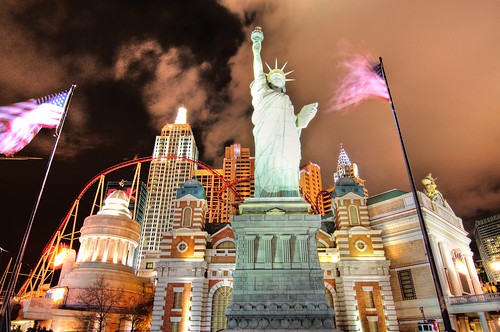
I will take my shot above to share my experience with different HDR techniques. (For further infos of my general HDR procedure check this). One typical question for me was all the time: should I make 3 or 5 exposures of a scene or is it enough to do only one shot and do the rest in photoshop afterward? For the photo above I show you the different versions from photoshop. There is no tone mapping applied afterward.
In general, the differences are very little (If you want to see the difference better, I recommend to download the pictures to your computer and compare them by stack them above each other). Thus, it is up to you if you want to go the extra mile of 5 exposures to get more for your final photo.
5 exposure HDR with 1 EV intercepts
Pro:
– More image information. Every time when I tried this comparison with 3 exposure, I got a sightly better result here. In this example, you see more details on Miss Liberty and in the shades of the buildings. That was the base for my final picture above.
– Some times I observed less noise in the 5 exposure version
Cons:
– More work, More computer calculation time, and more space on the computer
– You need to align more picture in the HDR process, if it is hand hold. I got often bad results in photomatics, therefore I would recommend photoshop to do the first HDR alignment script (see here). For the auto alignment script (edit menu) in photoshop, I receive often bad results the more picture I take. I never observed that with the HDR script of Photoshop, but would be cautious about it. Bad aligned photos destroy significantly infos and make the photo unsharp. Main reason why I do mainly 3 Exposure.
3 Exposure HDR with +-2 EV:
pro:
– Almost like the 5 Exposure version (see for differences above)
– Faster and not so much work as the 5 exposure version
– Only alignment of 3 exposure needed
– Most cameras have 3 exposure auto-bracketing (mine doesn’t have 5 exposure auto-bracketing. another main reason why I use mainly 3 exposure).
cons:
– slightly more noise than 5 exposure
– theoretically less picture information
3 exposure HDR with +- 1 EV
It depends on the situation, if you need +- 1EV or +-2EV. I usually go with 2 EV, although I might overexpose and underexpose too much, because I’m anyhow interested in only special parts on this shots (light areas in an underexposed version and dark areas in the over exposed area)
Single HDR: 1 Raw File and photomatix
In total, not bad. But, if you compare them with the 3 exposure, you see a significant difference. Look for instance on the details of the lights (e.g. Miss Liberty).
[update]
Single HDR: 1 Raw File –> 3+-2EV Tiff and photomatix
In this example I need to take the standalone version of photomatix. Therefore the colors pop more than the previous one. But if you look closer you see more noise and some lost details in comparison to the others.
pro:
– You can use this approach on older jpgs in your archive
contra
– A Lot to convert and save
– In comparison to the direct 1 Raw file solution it has surprisingly more noise
– I get pretty similar results with hdr-style filters like topaz adjust or nikon effex
I hope the pictures are helpful for your photography. Please let me know, if you have any questions or remarks
All the best
Werner


